Showing posts with label recipes. Show all posts

Tuesday, September 20, 2011

Tutorial Tuesday: Frosting Filled Cupcakes

Wow!  It seems like it's been forever since I've blogged, but I'm hoping to slowly start blogging again!  Thanks to all of my followers who have been patient with me over the past couple months!

Two weeks ago today was one of the most exciting days I've had during my pregnancy.........it was gender reveal day!  My hubby & I decided we wanted to find out what we were having, but instead of just calling our families, we wanted to tell them all at once during dinner.  But of course, we couldn't just tell them.....that would be too easy!  So we decided to make frosting filled cupcakes, pink frosting for a girl and blue for a boy!  So off to the internet I went to find out just how to fill the cupcake with this special frosting.  And I thought I'd share this very easy tutorial with you.

1) Using whatever recipe you desire, bake your cupcakes & let cool. 
(Okay, so I cheated & used a box mix.)

2)  Using a sharp knife, cut a cone shape out of the middle.

3) Fill the hole with frosting.

 3) Place the "cone" back on the cupcake, gently pressing down.

4) Add icing to the top to cover your cut.

It's that easy!!!

So back to the story......we had dinner with our families, making them wait the whole night to find out what we were having.  They loved the suspense & were constantly trying to get us to accidentally slip up & say "he" or "she."

Then came dessert.  Everyone picked their color of cupcake, and at our direction, they all took a bite at the same time......and this is what they saw!!!


So, in case you didn't catch the icing in the middle.....
It's a Girl!!!


Can't wait to meet our sweet baby girl in early February!


Tuesday, June 14, 2011

Tutorial Tuesday: Bacon Cheeseburger Quiche

Do you like bacon cheeseburgers?  Do you like quiche?  Well, then this recipe is for you!

Good for lunch or dinner or even a brunch, this is an easy, low-carb recipe.

What you'll need:
1 lb. very lean hamburger meat
1 small chopped onion (optional)
4 slices crisp bacon, chopped in bits (or to make it even easier, you could just use packaged bacon pieces)
3 eggs
1/2 cup mayonnaise
1/2 cup half-n-half
8oz. shredded cheddar or swiss cheese
garlic powder to taste (optional)
salt & pepper to taste


Directions:
1) Brown hamburger meat in skillet (with onion if desired), adding salt & pepper to taste.

2) Remove & mix in bowl with bacon pieces, breaking up large clumps with a fork or pastry mixer until you have a fine mix.  {Hint: I actually used the pre-cooked microwavable bacon so it's faster & easier.  I simply heat it 'til it's crispy.  Or if you want even easier, there's always packaged bacon pieces!}

3) Drain of excess grease & press into bottom of a deep-dish pie pan.  {Glass pans work just fine, too.}

4) Combine remaining ingredients in mixer bowl & whip well.

5) Pour mixture over hamburger meat.

6) Bake at 350* for 40-45 minutes or until top is browned & "set."

7) Cool 15-20 minutes before slicing.

ENJOY!

I'll be joining the following link parties:
Tempt My Tummy Tuesday @ Blessed with Grace
Fun With Food @ Paisley Passions

Food on Fridays @ Ann Kroeker
Foodie Friday @ Designs by Gollum
Savory Sunday @ The Sweet Details

Tuesday, May 31, 2011

Tutorial Tuesday: Gumdrop Flower Petal Cupcake Garnish

A couple weeks ago, when I shared my Flowers~N~Flutters dessert table, I promised you a tutorial on the "flower petal" cupcakes.  So here it is.

What you'll need:
Gumdrops
Granulated Sugar
Mint Leaves
{and cupcakes, of course}

Directions {Adapted from Southern Living's 101 Essential Southern Recipes}:

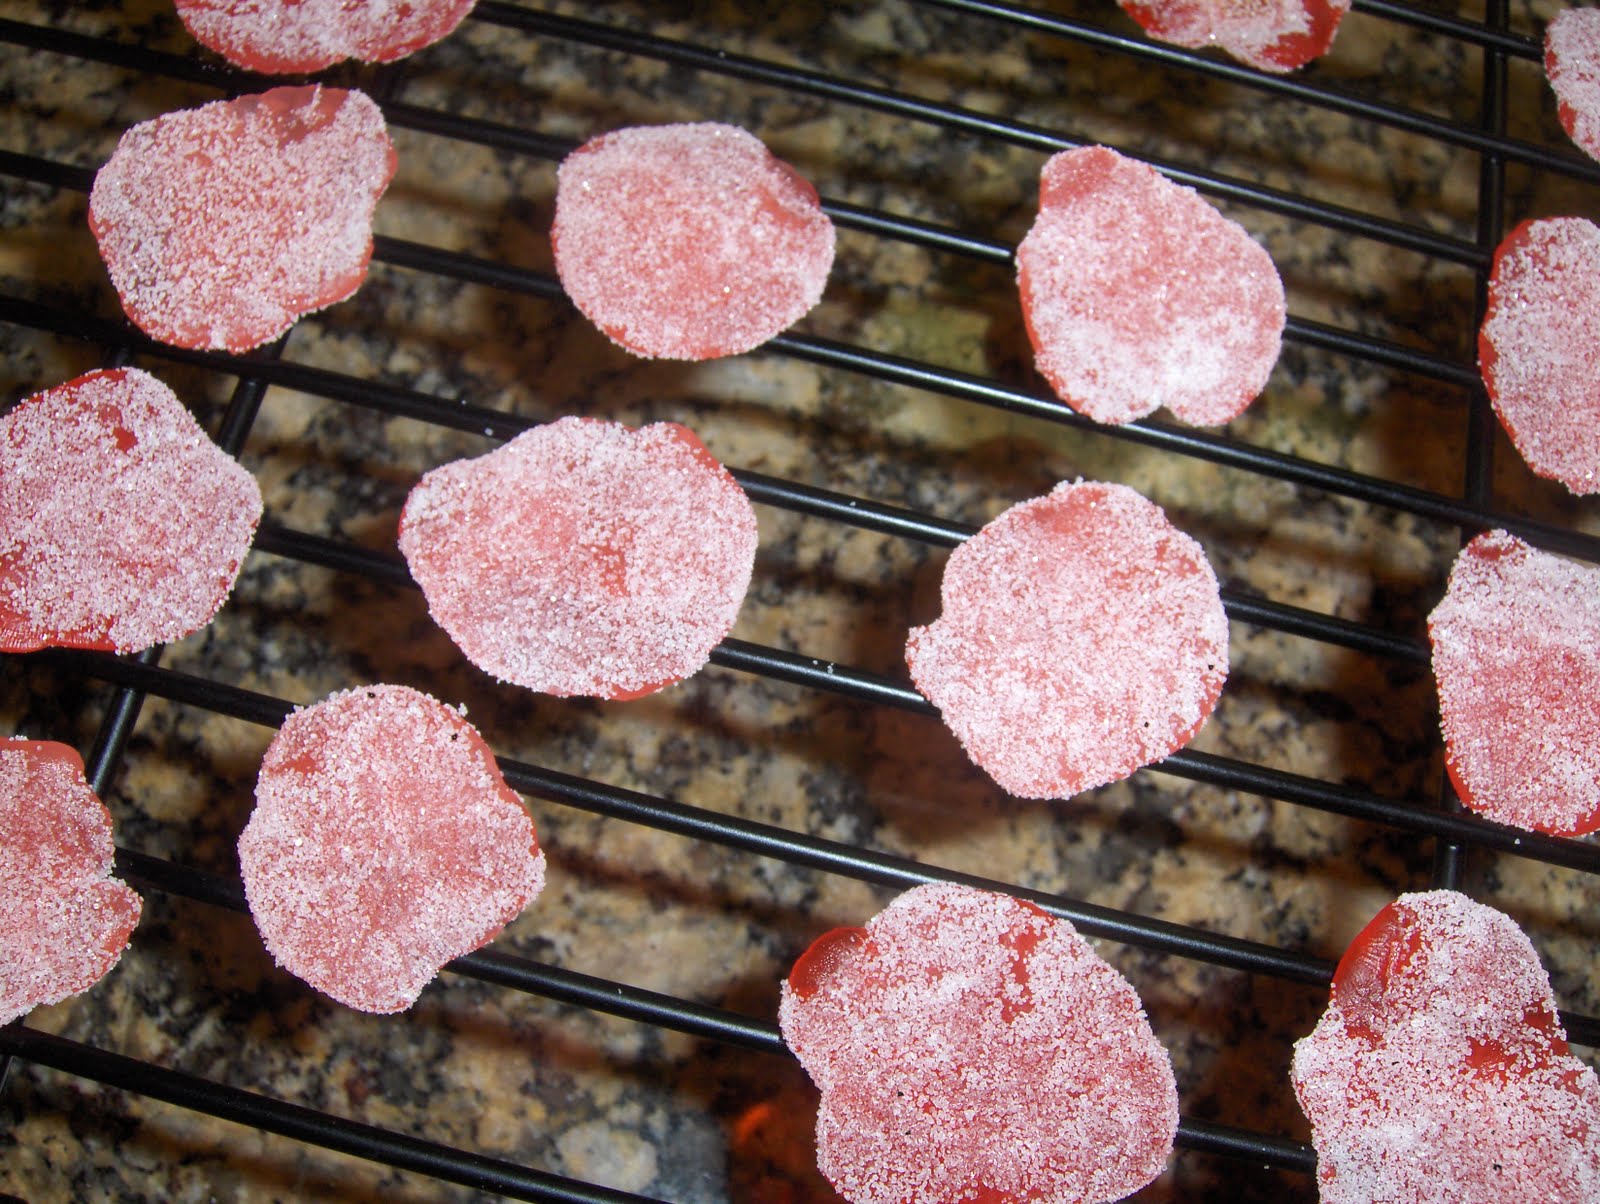
1) Using your fingers, flatten gumdrops to about 1/8 inch thickness, gently lengthening & widening to form desired shape.


2) Dredge lightly in sugar. 
{Tip: I found that if I gently rubbed a dampened papertowel on both sides of the gumdrop, the sugar stuck much better!}

3) Place on wire rack & let stand for about 24 hours.


4) Gently press the lower center of the petal inward, cupping the petal & curl the outer edges backward if desired.

5) Place the "point" of the mint leaf  in the icing to hold it in place.
(I cut the leaves down to the desired size, making a sharp point on one end.)

6) Add petal to cupcake.


I'll be linking to the following parties:
Tempt My Tummy Tuesday at Blessed with Grace


Cupcake Sunday @ My Cozy Corner

Tuesday, May 24, 2011

Tutorial Tuesday: Buttermilk Poundcake & Powdered Sugar Glaze

Last week, I shared my "Flowers~N~Flutters" Dessert Table {click for post}, which featured this buttermilk poundcake.

So here's what you'll need for this tasty treat:
~ 3 cups all-purpose flour
~1/4 teaspoon baking soda
~1/2 teaspoon salt
~ 1 cup butter
~ 3 cups white sugar
~ 6 eggs
~ 1 teaspoon lemon extract (optional)
~ 1 teaspoon vanilla extract
~ 1 cup buttermilk

Directions:
1) Mix together flour, baking soda, and salt.  Set aside.
 2) In a large bowl, beat butter with sugar.
 3) Mix in eggs, one at a time, beating well after each addition.
 4) Stir in lemon & vanilla extracts.
 5) Gently mix in flour mixture alternately with the buttermilk. {I do about a third of each at a time}.
 You should end up with a nice, creamy mixture.
 6) Pour batter into greased, floured 9 or 10 inch tube pan.
7) Bake at 325* for approximately 90 minutes. 
{You might want to check it a few minutes earlier, but do not open the oven door until the cake has been in the oven for a least one hour.  When the cake begins to pull away from the side of the pan, it is a good sign it is done.}
 8) Let cool in pan for 10 minutes, then turn onto a wired rack & cool completely.


The cake is delicious by itself, but if you want it a little sweeter, here's the glaze recipe:

What you'll need:
~ 1 lb. powdered sugar
~ 1/4  cup (or more) milk
~ 1/4 teaspoon vanilla

Directions:
Mix powdered sugar & milk together, then mix in vanilla.  Continue adding milk a little at a time until you reach your desired consistency. 
Pour over cake.
{Tip: If you don't want glaze all over your cake plate, sit cake on another plate to add glaze.  When glaze has hardened, carefully transfer to desired cake plate.}
I originally wanted to find edible, pesticide-free flowers for the cake, but didn't have much luck.  So I chose to place the flowers in a little water-filled cup, gently placed in the middle of the cake.

Enjoy!


I'll be joining with Foodie Friday at Designs my Gollum, Masterpiece Monday at Boogieboard Cottage, Craftomaniac Monday at Craft-O-Maniac, Hoo's Got Talent at Night Owl Crafting, Sweets for Saturday at Sweets as Sugar Cookies, and Tempt My Tummy Tuesday at Blessed with Grace.  Check 'em out for more delicious recipes.

Tuesday, May 17, 2011

Tutorial Tuesday: Creamy, Crunchy Chicken


This is the yummiest, easiest chicken recipe!  I've made it for family & friends, and often get requests to make it again!

Here's what you need:
~ 4 boneless, skinless chicken breasts
~ swiss cheese
~ 10 3/4 cup can cream of chicken soup (more if you want it creamier)
~ 1/4 cup milk
~ 1 cup stuffing mix (more if you want it crunchier)
~ 1/2 stick butter (melted)


Directions:
1) Place chicken in 9X9 baking dish.
(Since I took these pics on Mother's Day, when I tripled the recipe, it's a little more than what the recipe above calls for.)

2) Top each piece with a slice of swiss cheese.

3) Mix soup & milk together.  (I use a little more than what the recipe calls for because we like it a little creamier.)

4) Pour over chicken.

5) Sprinkle stuffing mix over soup.  (I use a lot more than what the recipe calls for because my hubby likes it extra crunchy!)

6) Melt butter & drizzle over the top.


7) Bake, uncovered, at 350* for 45-55 minutes.


ENJOY!

I'm linking with Tempt My Tummy Tuesday at Blessed with Grace & Foodie Friday at Designs by Gollum.  Check them out for more amazing recipes!