Friday, March 11, 2011

Friday Favorites: Curtain Call

One of my favorite places in our house is the big, oversized chair right in front of our picture window.  Whether it's sitting by the cozy fireplace, sipping hot chocolate and watching a movie, or curling up with one of my favorite magazines, or just simply sitting quietly and watching the birds and squirrels in our backyard and the forest of trees beyond, there is just something about that spot that puts my mind at ease.


 When we built our house about 4 years ago, we chose the biggest possible window the wall would allow.  After all, one of the reasons we decided on this particular location was for the beautiful scenery.  Not only does it back up to miles and miles of forest on one side, but it also adjoins a ranch, which means we often see cows and donkeys and even the occasional deer!

(view from our back porch)

(view of our backyard last winter during a snow storm)


So naturally, wanting to be able to enjoy the view, we originally chose to keep the window bare.  While we loved the idea, it had one main problem.......we began to notice that at certain times of the year, the sunlight flooded the room for a few hours each day.  And we all know what happens when a room is flooded with UV rays.....things begin to fade!


(If you look out the window, you can see that we're in the middle of a landscaping project!  With a landscaper for a husband, we have huge plans for our yard.....a little at a time!)

So about a year ago, we began our search for the perfect window treatment.  We wanted something that would not only coordinate with our decor, but also serve as an appropriate "frame" for the beautiful backdrop it would showcase.  It was also important that we be able to easily close it to block out the light when needed, but open it to let in the beautiful view the rest of the time.

Well, many hours, books, show homes, and fabric stores later, we had several possible fabrics and trims and a few ideas for the design.  We spent countless hours choosing exactly how we wanted it to look.  We even purchased one of our trims during a trip to Texas! 

(This is just a small portion of the samples we gathered!)
(some of our many sketches & measurements)
Next on the list was the hardware, which again took many hours of searching and deciding.  But we finally selected this very substantial & beautiful hardware by Paris Texas Hardware. 

I especially love the "GLOW" finish, which has an aged look.


  Finally, we had all the materials we needed.  The only problem?  Who was going to make them?  I do many things, but sewing is one thing I have yet to learn (although it is on my list of things to do!). 
However, I have a very talented (and sweet!) mother-in-law, who stepped up to the plate!  And after spending many, many hours putting them together, last week they were finally complete! 


We selected a deep red and tan jacquard for the main portion, and a couple strips of leopard print with a dark chocolate brown "krinkled" velvet inbetween.

And when I came across this fabulous tassel trim, which incorporates all the colors in our color scheme, I just knew I had to use it somehow!

I love the way it looks against the leopard print fabric!


We chose a different (and less pricey!) tassel trim to add a little extra flair to the edge of the panels. 
I especially like how it looks when the curtains are open!


So now that you've seen what they look like closed, here's a picture of what they look like open.


We wanted to give ourselves a couple of options for tying them back, so we chose this coordinating hardware for one option.......

.....and this tassle tieback for another!


I love the way the panels "puddle" on the floor!


And I must say, all of the time and money was worth it!


I'm now even more in love with this favorite spot!


I'm linking with Susan from Between Naps on the Porch for Met. Monday & The Charm of the Home for Home Sweet Home!

Thursday, March 10, 2011

Tablescape Thursday: The Meaning of Mardi Gras

For all have sinned and fall short of the glory of God, and are JUSTIFIED freely by His grace through the redemption that came by Christ Jesus.  God presented Him as a sacrifice of atonement, through FAITH in His blood......He did it to demonstrate His JUSTICE at the present time, so as to be JUST and the one who JUSTIFIES those who have FAITH in Jesus.  Romans 3:23-26 (NIV)

By His POWER God raised the Lord from the dead, and He will raise us also.  I Corinthians 6:14 (NIV)

You might be wondering how these Scriptures are related to a Mardi Gras tablescape.  Well, let me explain......


To be perfectly honest, I had absolutely no intention of doing a Mardi Gras tablescape.  And while I'm being honest, I must admit, until a couple days ago, I wasn't even really familiar with what Mardi Gras is truly all about.  Instead, the words "Mardi Gras" conjured up a negative image in my head, one associated with revelry and vulgarity. 

So how did I end up doing a Mardi Gras tablescape, you ask?  Well, you see, this past week I put together a St. Patrick's Day tablescape (or at least my version of a St. Patrick's Day tablescape), fully planning to share it this week.  But something happened......when I stepped back to look at the finished product, something about the black & emerald green color scheme reminded me of Mardi Gras.  That got my creative juices flowing, and I began to imagine what it would look like with just a few simple changes.......adding some gold & purple placemats, changing out the napkins for purple or gold ones, and maybe adding a mask or some beads.  And as I've shared before, if I get something in my head, I HAVE to make it happen, or it will just stay in my head! 

But I still couldn't quite get past the negative image I associated with the occasion.  So I decided I needed to do a little research first.


First, I discovered that "Mardi Gras" really means "Fat Tuesday."  Okay, what does that mean, and why is Tuesday fat?  Well, I found out that long before the holiday was transformed into simply a reason to party, it really did have a deeper meaning.  You see, it is the last day before Ash Wednesday, and Ash Wednesday, which is always the seventh Wednesday before Easter, marks the beginning of Lent.  So what exactly is Lent?  Well, it is a time when many Christians, particularly Catholics, abstain from some type of food (usually meat) in preparation for Easter.  In other words, they sacrifice a little in order to prepare their hearts for the greatest sacrifice of all - Christ's death on the cross -  & His resurrection! 


Of course, back in the day, refrigerators weren't available, so in order not to waste the food, they would often stuff themselves the day before Lent began.  This also gave them one last feast before the fasting......thus, "Fat Tuesday" came about. 


So what about the colors we often see associated with Mardi Gras: purple, green, and gold?  Well, a little research revealed that the purple stands for justice, the green for faith, and the gold for power.  The masks, I also discovered, are connected with justice.....meaning that when hidden behind the masks, everyone is equal.


Now that I knew the origin, I had a little more to work with, and I began to transform Mardi Gras into something that had meaning for me.....something with a very positive image.  You see, although I'm not Catholic and don't typically abide by the Catholic calendar, I can appreciate anything that honors and celebrates Jesus and the sacrifice He made for you and me.  And as for those colors, well if you ask me, they go hand-in-hand with Jesus' sacrificial death and resurrection.  It is only by FAITH in Jesus that we are saved, that we are forgiven and receive JUSTIFICATION, and that we are given POWER over sin and death. 

Wow!  Now that's something worth celebrating!


So now on to the tablescape that I just couldn't get out of my head:


 A solid black tablecloth serves as the backdrop.


A combination of purple and gold beaded placemats, along with the black rhinestone chargers and clear silverware, add some drama and sparkle to the setting.


The black scalloped dinner plate is topped with a green glass salad plate, which is then topped with a black glass appetizer plate. 
The more layers, the better!


A coordinating green goblet is showcased atop the plates.


A deep purple napkin surrounded by a gold overlay is secured with a green napkin ring that is actually turned backwards, helping the napkins to "stand" in the goblets. 


 A quick trip to Party Galaxy provided some inexpensive sequin masks, which are wrapped around the napkins a couple times to help hold them in place.  I love that each of the masks is slightly different.


The simple centerpiece is made up of a footed bowl containing a green candle and lots of beads, which drape casually over the edge.  (You'll have to wait 'til next week's tablescape to see what's hiding under the beads!) 
Two small green candleholders flank either side.


As I was working on the tablescape, I remembered a gold pillar candle with a fleur-de-lis etching that I had, which I thought would be absolutely perfect.......HAD being the key word.  As I looked through my cabinet of candles, I realized that I no longer had that candle.  I must have donated it in one of my obsessive cleanings at one point.  Don't you just hate it when that happens?  You think of just the perfect accessory, and then realize you no longer have it.  Or am I the only one that does that?

So anyway, I settled for a green one.


So there you have it: a very meaningful Mardi Gras tablescape! 


As I mentioned earlier, this actually evolved from a St. Patrick's Day tablescape, so check back next week to see how by just changing a few "accessories," you can make a whole new tablescape!

black tablecloth - Bed, Bath, & Beyond
purple beaded placemats - Target
gold beaded placemats - Hobby Lobby
black rhinestone chargers - Michael's
black scalloped dinner plates - by Rosanna
green salad plates/goblets - Horchow
black appetizer plates - Cracker Barrell
green napkin rings - Pier 1
gold overlay - Steinmart
purple napkins - I absolutely cannot remember!
silverware - Walmart
masks/beads - Party Galaxy
footed bowl - Hobby Lobby

I'm linking with Between Naps on the Porch for Tablescape Thursday.  Check it out to see several more beautiful and creative tablescapes!

Wednesday, March 9, 2011

Wildcard Wednesday: Signs of Spring.....In My Kitchen

I just love the cheery colors and the brightness of spring, and although there aren't many signs of spring outside just yet, I'm adding a few of my own indoors.  I don't decorate nearly as much for spring as I do for fall, and definately not as much as I do for Christmas.  I guess there is just something about this time of year that makes me want more openness......an airiness, a lightness......around my house.  But there are a few key areas that I like to change with every season.  So over the next few Wednesdays, I'm going to share some of my "signs of spring" with you.
One area that I love to change with the changing seasons is this set of glass canisters by Gracious Goods.  I have another set of canisters that I use to actually store flour & sugar, so I bought this set with the pure intention of using it to decorate.  This last weekend, I replaced my "winteresque" glittery pinecones & acorns with some faux eggs and small nests.

(decorated for winter)

(decorated for spring)

I love the pop of color the eggs add to this area of my kitchen.  The nests are new this year.  Last year, I simply filled the canisters with the eggs.  I'm thinking next year I might use all turquoise eggs with the nests.  Of course, by then I'll probably have some other idea.  
You know me, I can hardly get one season of decorating finished before I'm already thinking about the next!

Tuesday, March 8, 2011

Tutorial Tuesday: Yummy Oreo Balls

I must admit, I have a weakness for Oreos.  There's just something about the combination of a crunchy chocolate cookie mixed with vanilla cream that makes my taste buds dance.  I like them in any shape or form: by themselves, in ice cream or a malt, or covered with chocolate!

So when I came across a "holiday" calendar a fews days ago that proclaimed March 6 to be "Oreo Cookie Day," I knew that gave me a good excuse reason to make one of my favorite treats: Oreo Balls. 


Here's what you'll need for this tasty treat:
1 package regular size Oreo cookies
8 oz. cream cheese
1 package white almond bark
approximately 1 tablespoon vegetable shortening
1 package Baker's dipping chocolate OR chocolate almond bark


Directions:
1) Allow cream cheese to soften for a few minutes. 
(I simply have it sitting out while I gather my ingredients & prepare my Oreos.)

2) Place Oreos in a resealable bag & crush.
(Sorry I forgot to take a picture after they were crushed!)
 3) Using a food processor, mix Oreos & cream cheese together. 
(If you do not have a food processor, a blender or hand mixer should also work, as long as you finely crush the Oreos beforehand.)

(Before Mixing)
(After Mixing)
4) Chill mixture for about 1 hour.

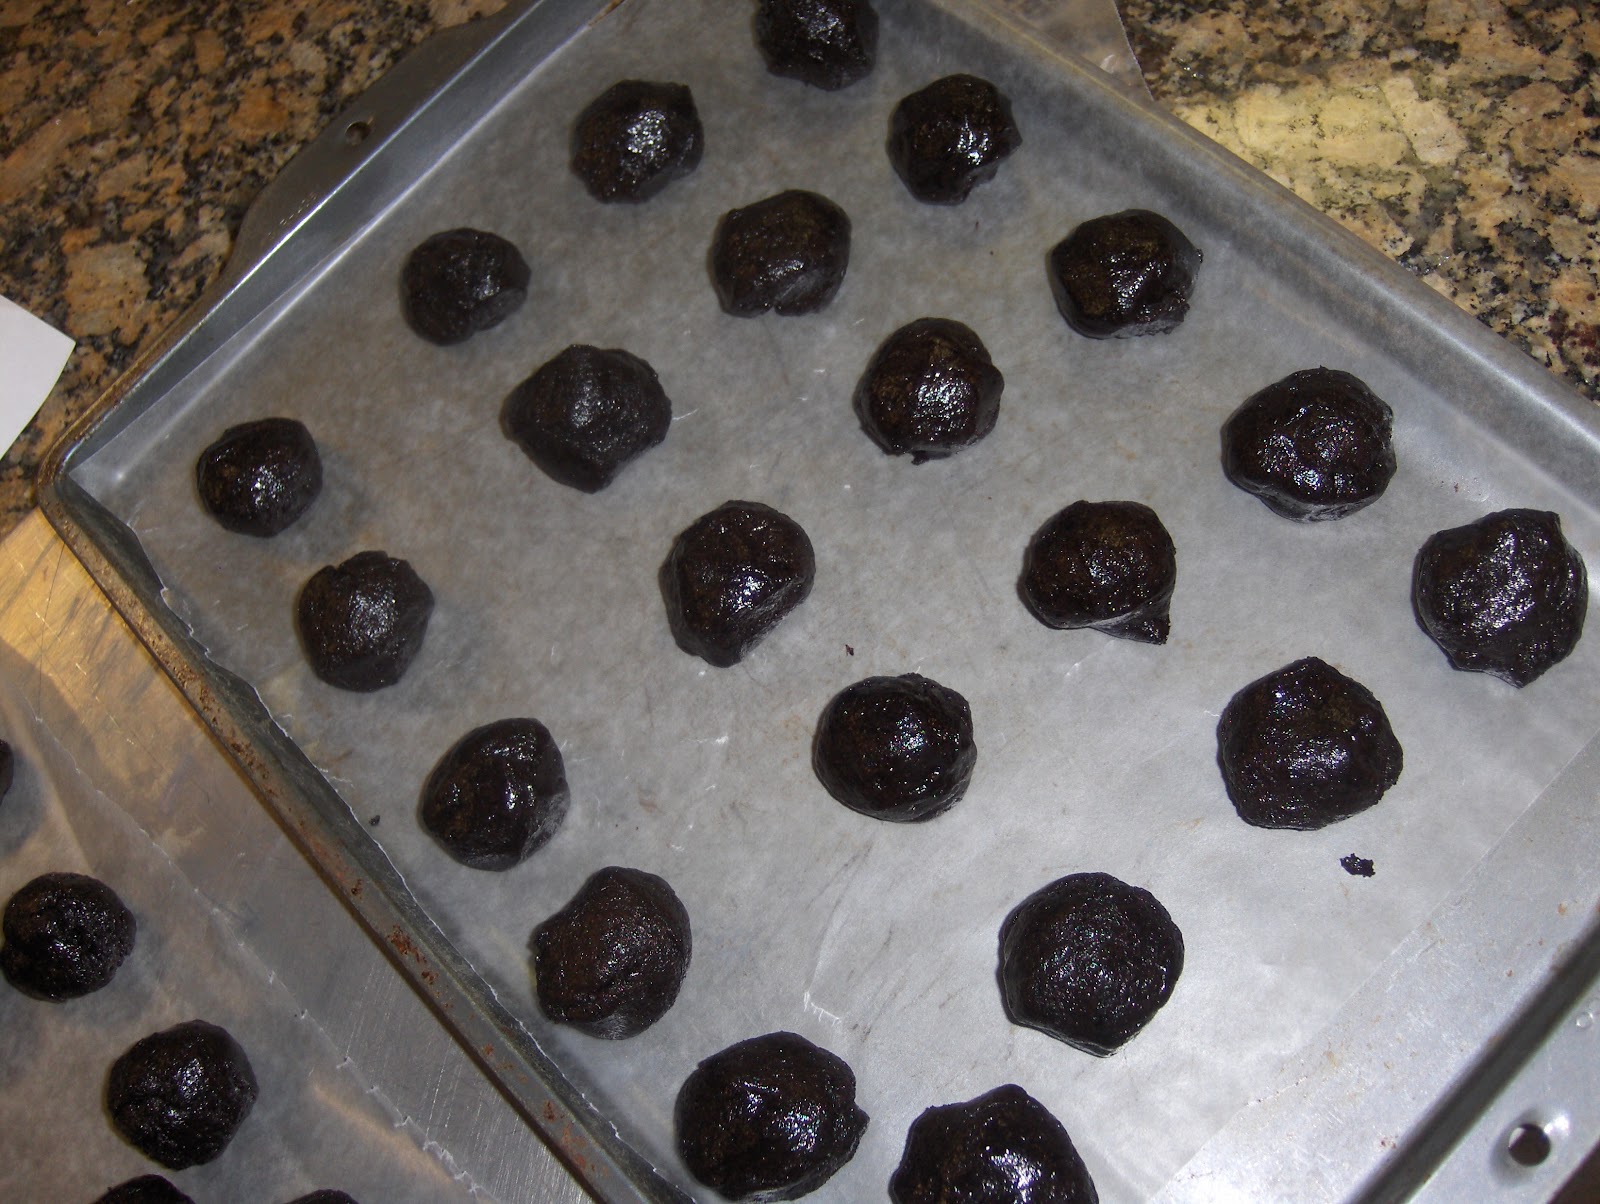
5) Roll into small balls (approximately walnut size).


6) Return Oreo balls to refrigerator (or freezer).  Melt white almond bark according to package directions (I prefer using a double broiler).  If almond bark appears too thick for dipping, add a little vegetable shortening to thin it out. 

7) Using a toothpick, dip Oreo balls into the melted almond bark & place on wax paper.  Allow to harden for a few minutes.  (To speed up the process, you can place Oreo balls in the freezer for a few minutes.)


8) While the white chocolate is hardening, melt Baker's dipping chocolate (or chocolate almond bark if you prefer) according to package directions. 

9) When Oreo balls have hardened (no longer sticky to the touch), drizzle chocolate on top.  You can do this by either using a sandwich bag with a tiny hole cut in one corner, or you can do as I did & simply use a spoon.  (My clever husband showed me that if you hold the spoon high enough, it will be a thin stream by the time it reaches them - rather than a big clump.)


10) Enjoy!!!


These are great for parties!  Not only are they fairly simple to make, but one batch makes 2-3 dozen.  Plus, their richness makes it difficult for most people to eat more than 2 or 3 at a time, making them last longer!  You can also freeze leftovers, and they'll keep for days.

Hmmm....now I'm craving another Oreo ball.  Good thing we still have several in our freezer!

Sunday, March 6, 2011

Scripture Sunday: The Tower of "Babble"

Now the whole world had one language and a common speech....Then they said, "Come, let us build ourselves a city, with a tower that reaches to the heavens, so that we may make a name for ourselves and not be scattered over the face of the whole earth."  But the Lord came down to see the city and the tower that the men were building.  The Lord said, "If as one people speaking the same language they have begun to do this, then nothing they plan to do will be impossible for them.  Come, let us go down and confuse their language so they will not understand each other."  So the Lord scattered them from there over all the earth, and they stopped building the city.  That is why it was called Babel - because there the Lord confused the language of the whole world.  Genesis 11:1, 4-9 (NIV)

I'm going to keep this short & sweet today, but I want to share two thoughts:

1) Obviously, there is nothing inherently wrong with constructing buildings or towers, but it was the motivation behind it that troubled God: their strong desire to make a name for themselves and their reliance on themselves, rather than on God. 

When I read this, I had to do a little self-reflection.  I don't know about you, but for me, too often I'm focused on what will help me look good and what will help me gain the approval of others.  Even when I initially start out doing something with the pure intention of glorifying God, it is all too easy to lose my focus along the way.  Ironically, it seems that it is often at the times that God is most blessing my endeavors, that pride kicks in and my focus quickly changes to myself.  Hmm, I'm noticing a recurring theme in my life lately of the need to not only glorify God, but also to seek acceptance &  self-worth from Him!  (Click here to see related posts.)

Galations 1:10 says, "Am I now trying to win the approval of men, or of God?  Or am I trying to please men?  If I were still trying to please men, I would not be a servant of Christ."  Colossians 3:23 says this: Whatever you do, work at it with all your heart, as working for the Lord, not for men.  I Thessalonians 2:5 says, "....We are not trying to please men but God, who tests our hearts."  And finally, John 8:54 says, "Jesus replied, 'If I glorify myself, my glory means nothing....' "  Wow!  If even Jesus, who was God wrapped up in human form, didn't have the right to glorify himself, how much less do I?  God, may I only seek to honor and please You!  Please tear down any towers of pride in my life.

2) My second thought from this passage focuses on verse 6, which is where God states that if they are one people, speaking the same language, then nothing will be impossible for them.  Although this isn't typically the lesson or sermon we hear concerning this message, this verse made me stop and think a minute about the importance of communication.  So God is saying that if they can communicate purely, without any confusion or misunderstanding, that they can succeed in anything they do.  What does that say about the importance of communication in our relationships?  Our marriage?  On the job?  And of most importance, what about our communication with God?  My prayer is that God gives me the wisdom to know how to best communicate with those around me.  But more than that, I pray that my communication with God becomes all that it needs to be.  And by the way,communication doesn't just involve speaking, it also involves listening!

Saturday, March 5, 2011

Simplify Saturday: Zip Through Your Zones

It's that time of year again....the time that everyone begins thoroughly cleaning their homes, getting rid of clutter, making room for some new clutter! :) Since I've been sharing a few tips from Sink Reflections lately, I figured why not continue the pattern?  So here is another simple tip from this helpful book:

Instead of manically spring cleaning all at once, why not divide your house up into zones, and work on it a little at a time?  The author suggests dividing it into 5 zones:
1) entrance/dining room/front porch
2) kitchen
3) bathroom/children's room(s)/spare bedroom or office
4) master bedroom/master bathroom
5) living room/family room/den

She decided on 5 zones because there are usually about 5 weeks each  month, so each week of the month you can focus on a different zone.  She recommends working on the current zone for only 15 minutes to an hour each day, knowing that if you don't get everything finished, you can pick up where you left off the next month!  She also gives suggestions of exactly what needs to be done in each zone.

Due to my schedule, I prefer to divide my house into 6 zones, and only focus on one each month....which means overall, I "spring clean" my house twice a year.  If that's still too overwhelming for you, you could also take 2 months to clean each zone, and by the end of the year, you'd be done with the whole house.

No matter how you divide it up, the important part is that it's broken into smaller, more managable tasks, so that it feels much less overwhelming!  And when you know you only have to clean for a few minutes, you're more likely not to put it off! 

Before you know it, you'll be zipping through all your zones!