Thursday, March 17, 2011

Tablescape Thursday: Diamonds & Emeralds

.....and the second row an emerald, a sapphire, and a diamond....
Exodus 28:18 (ASV)

Last week, when I shared my Mardi Gras tablescape, I mentioned that it had originally been a St. Patrick's Day tablescape.....or at least my version of a St. Patrick's Day tablescape.  I don't really have any St. Patrick's Day decorations or dishes, so I opted to use the closest thing I have.....
my emerald green dishes mixed with some black dishes. 

 
So how did I come up with "diamond & emerald" theme?  Well, the emerald green glass reminded me a little of..... well.......emeralds, which happens to have significance for me because it's my birthstone. 
And of course, what girl doesn't love diamonds?  Obviously, the diamond has significance because it reminds me of a little something on my left hand, which symbolizes a very important relationship with the love of my life! 
So, that's how it all got started.


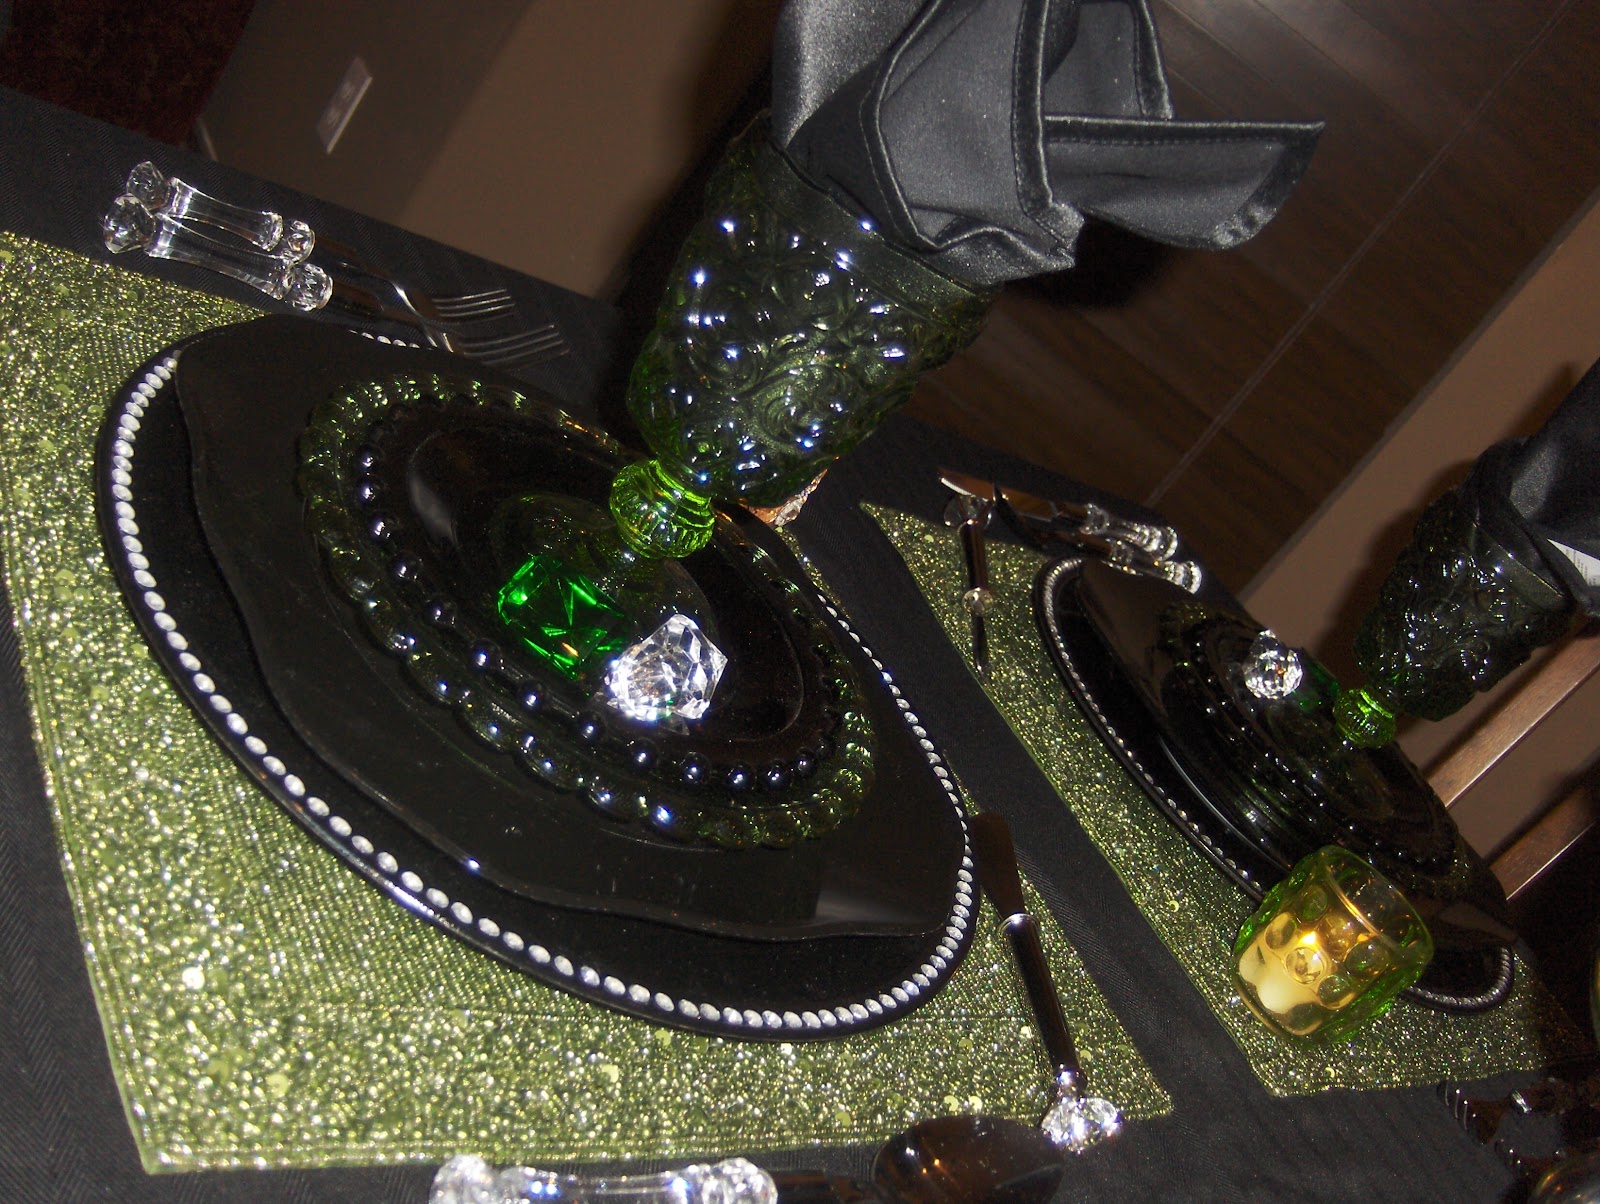
A solid black tablecloth serves as the backdrop and sets the tone for this somewhat formal table.


Green beaded placemats add some drama, while black chargers outlined with clear rhinestones add a little sparkle & coordinate with the "diamond" theme.  And for this "diamond & emerald" table, the more sparkle, the better!


 Black scalloped dinner plates are topped with emerald green salad plates, followed by black appetizer plates.  You know how I love my layers!


Coordinating emerald green goblets make a statement atop the many layers of plates.
A black napkin is tucked inside the goblet, along with a diamond drink stirrer, again to add a little more sparkle.


And what would a diamond & emerald tablescape be without a few "diamonds" & "emeralds"? 


The clear acrylic silverware, along with the "diamond" spreader knive, again adds some sparkle to each place setting.


A candle, either emerald green or clear rhinestones, adorns each place setting as well, adding some glamour, and of course, more sparkle.


And last, but not least, last week I mentioned that there was something hiding underneath those Mardi Gras beads.......well, here's the big reveal......
(okay, so it's really not that exciting)

The simple centerpiece consists of a black footed bowl, containing a green candle, surrounded by many glass & acrylic diamonds & emeralds!


If you have some basic dinnerware (such as black, cream, or white), it's amazing what all you can do just by making a few simple accessory changes! 

By simply changing out the placemats & napkins, and exchanging the diamonds & emeralds for masks, and adding a few beads to the centerpiece, this tablescape went from this......


......to this.......


...in less than 15 minutes!

black tablecloth/napkins - Bed, Bath, & Beyond
green beaded placemats - Target
black rhinestone chargers - Michael's
black dinner plates - by Rosanna
green salad plates/goblets - Horchow
black appetizer plates - Cracker Barrell
"diamond" stirrers & spreaders - Tuesday Morning
flatware - Walmart
votive candleholders - Hobby Lobby & Ross
black footed bowl - Hobby Lobby
"diamonds" & "emeralds" - Hobby Lobby & Michael's

I'm linking with Susan from Between Naps on the Porch for Tablescape Thursday.  Stop by to see all the creative & beautiful tablescapes.

Wednesday, March 16, 2011

Wildcard Wednesday: Signs of Spring .....In My Entry

This time of year always inspires me to do a little nesting........quite literally.......because one of my favorite spring decorations is NESTS.


Last week I shared that one of the spots I like to change seasonally is my set of glass canisters in the kitchen.  Well, another spot I like to change is my entry table.  I think the entry sets the tone for the whole house, and I want to be sure that guests (and ourselves, for that matter) have a pleasant greeting from the time they enter.


So each season I change out the contents of the big metal bowl......grapes & decorative balls for summer, pumpkins & gourds for fall, pomegranates or ornaments for Christmas, and nests & eggs for spring.


A little greenery wrapped around the base of the cream candles also says "spring"!


Join me next week.....same time, same place.....for more signs of spring.

I'm joining with This Blessed Nest for Spring Fling & A Stroll Thru Life for Tabletop Tuesday.  Check them out for more great ideas!


Tuesday, March 15, 2011

Tutorial Tuesday: Oatmeal Lace Cookies

Last week I shared my Oreo Ball recipe, inspired by "Oreo Cookie Day."  Well, guess what, March 18 is "Lacy Oatmeal Cookie Day."  (They have a day for everything!)  So I figured, what better time to share the oatmeal lace cookie recipe I used for my Valentine's Day dinner?

I must admit, this was my first time making these cookies, & I had a small (or shall I say big?!) issue.......I'll explain a little later on.

Here's what you'll need:
1 3/4 cups shortening
1 1/3 cups sugar
1 2/3 cups packed brown sugar
1 3/4 cups cake flour
2 1/2 cups whole oats
1 1/2 cups finely chopped pecans
2 teaspoons baking soda
1 teaspoon salt
2 teaspoons vanilla
3 medium eggs

Directions:
1) Preheat oven to 350*.

2) Place each ingredient in a large mixing bowl in the order listed above & mix for at least 2 minutes.  (I had to add a very small amount of water to help me mix it.)

3) Okay, here is where I went wrong!  The recipe calls for using a #60 dipper to drop the mixture onto a cookie sheet lined with parchment paper.  Well, I didn't have a #60 dipper and didn't even know what it was.  When I looked it up on-line, I read that it was equivalent to 60 ml or 2 oz.  Being the novice that I am, I just assumed that I could measure 2 oz. in a measuring cup and then try out a couple spoons 'til I found one that would hold the 2oz.  Makes sense, right?

Well, let's just say that 2oz. in a measuring cup must be WAY more than what this dipper actually holds!  My first few cookies ended up more like OATMEAL LOAVES!  They were huge.....falling over the side of the cookie sheet & super thick!  Keep in mind that these cookies are supposed to be thin and crispy.  While they still tasted good, they didn't look like oatmeal lace!

We even tried dipping a glass in flour and using it to "smash" the cookie dough down before baking.  This helped a little, but as you can see in the above picture, the flour was still noticeable even after they were baked.

After a little trial & error, I found that only about 1/2 teaspoon of the mixture is needed per cookie.  But either way, big or small, they are delicious!

4) Place cookies at least 3-4 inches apart because they'll spread  (I only placed 4-6 cookies per sheet pan.)

5) Bake 12-14 minutes until golden brown, thin, and crispy.

Enjoy!

Sunday, March 13, 2011

Scripture Sunday: The Call to Walk by Faith

The Lord had said to Abram, "Leave your country, your people, and your father's household and go to the land I will show you.  I will make you into a great nation and I will bless you; I will make your name great, and you will be a blessing.  I will bless those who bless you, and whoever curses you I will curse; and all peoples on the earth will be blessed through you.  So Abram left, as the Lord had told him......
Genesis 12:1-4 (NIV)

God asked Abram to separate himself.....to leave all that he knew (his country, people, & household), all that he was comfortable with, to go to a place that he knew nothing about.  For that matter, he didn't even know where he was going because God had yet to show him.  Abram obeyed simply out of faith that God had a plan and would be with him every step of the way.

While God may not be asking us to physically move from our current location, He very much is asking the same thing of us.  How is that, you ask? 

First, as His children, God asks us to separate ourselves.....to set ourselves apart from the world......to be different.....to get out of our comfort zone.  

Secondly, God has a divine purpose and plan for each and every one of us.  Often He will ask us to do things that don't make much sense to us.........but we can't always see the whole picture or the final destination.  It's at those times, that God asks us to simply walk by faith......to trust Him and His guidance.  It's not always an easy task, but one thing is for sure, if we will trust and obey God, He'll bless us beyond our wildest dreams! 

If your going through a difficult time right now and feel that you're all alone, or if what God is asking you to do just doesn't make sense, here are few promises to hold on to:

1) God promises to NEVER leave us or forsake us.  (Joshua 1:5)
2) He also says this, "For I know the plans I have for you.....plans to prosper you and not to harm you, plans to give you hope and a future."  (Jeremiah 29:11)
3) Romans 8:28 says, "And we know that in all things God works for the good of those who love Him, who have been called according to his purpose."
4) And finally, Philippians 1:6 reminds us, "that He who began a good work in you will carry it on to completion until the day of Christ Jesus." 

It's so comforting to know that our loving Father only wants the best for us and that He'll be with us every step of the way!  We must only walk!

Friday, March 11, 2011

Friday Favorites: Curtain Call

One of my favorite places in our house is the big, oversized chair right in front of our picture window.  Whether it's sitting by the cozy fireplace, sipping hot chocolate and watching a movie, or curling up with one of my favorite magazines, or just simply sitting quietly and watching the birds and squirrels in our backyard and the forest of trees beyond, there is just something about that spot that puts my mind at ease.


 When we built our house about 4 years ago, we chose the biggest possible window the wall would allow.  After all, one of the reasons we decided on this particular location was for the beautiful scenery.  Not only does it back up to miles and miles of forest on one side, but it also adjoins a ranch, which means we often see cows and donkeys and even the occasional deer!

(view from our back porch)

(view of our backyard last winter during a snow storm)


So naturally, wanting to be able to enjoy the view, we originally chose to keep the window bare.  While we loved the idea, it had one main problem.......we began to notice that at certain times of the year, the sunlight flooded the room for a few hours each day.  And we all know what happens when a room is flooded with UV rays.....things begin to fade!


(If you look out the window, you can see that we're in the middle of a landscaping project!  With a landscaper for a husband, we have huge plans for our yard.....a little at a time!)

So about a year ago, we began our search for the perfect window treatment.  We wanted something that would not only coordinate with our decor, but also serve as an appropriate "frame" for the beautiful backdrop it would showcase.  It was also important that we be able to easily close it to block out the light when needed, but open it to let in the beautiful view the rest of the time.

Well, many hours, books, show homes, and fabric stores later, we had several possible fabrics and trims and a few ideas for the design.  We spent countless hours choosing exactly how we wanted it to look.  We even purchased one of our trims during a trip to Texas! 

(This is just a small portion of the samples we gathered!)
(some of our many sketches & measurements)
Next on the list was the hardware, which again took many hours of searching and deciding.  But we finally selected this very substantial & beautiful hardware by Paris Texas Hardware. 

I especially love the "GLOW" finish, which has an aged look.


  Finally, we had all the materials we needed.  The only problem?  Who was going to make them?  I do many things, but sewing is one thing I have yet to learn (although it is on my list of things to do!). 
However, I have a very talented (and sweet!) mother-in-law, who stepped up to the plate!  And after spending many, many hours putting them together, last week they were finally complete! 


We selected a deep red and tan jacquard for the main portion, and a couple strips of leopard print with a dark chocolate brown "krinkled" velvet inbetween.

And when I came across this fabulous tassel trim, which incorporates all the colors in our color scheme, I just knew I had to use it somehow!

I love the way it looks against the leopard print fabric!


We chose a different (and less pricey!) tassel trim to add a little extra flair to the edge of the panels. 
I especially like how it looks when the curtains are open!


So now that you've seen what they look like closed, here's a picture of what they look like open.


We wanted to give ourselves a couple of options for tying them back, so we chose this coordinating hardware for one option.......

.....and this tassle tieback for another!


I love the way the panels "puddle" on the floor!


And I must say, all of the time and money was worth it!


I'm now even more in love with this favorite spot!


I'm linking with Susan from Between Naps on the Porch for Met. Monday & The Charm of the Home for Home Sweet Home!