Thursday, June 9, 2011

Tablescape Thursday: Black & White in Flight

You made my enemies turn their backs in FLIGHT.....
Psalms 18:40 (NIV)

To give  myself a little break from tablescaping this week, today I'm going to share with you a simple little dessert table I put together in April for a surprise party for my dad!

{I must warn you that the photo quality is not very good.  The restaurant was quite dark, & silver just doesn't photograph well with a flash!}
The party was to celebrate not only his 60th birthday, but also his retirement from the Air Force Reserves.

Here's a pic of my dad with my mom, me, & my sister on the day of his retirement!  So proud of him!

We held the party in a room at a local restaurant, where we were given one small table to use for desserts. 
Of course, I had to dress it up a little!


In keeping with the colors of our invitations, black, white, and touches of silver were used.

The silver serving pieces make a nice contrast to the black table covering.

A photo-board, using black & white photos of my dad from various stages in his life, captures important times & people in his life.  Sitting atop a black easel, it serves as a focal point and backdrop for the desserts.  {Later it became a treasured keepsake for my dad!}

  Two cake servers of varying sizes sit atop a rectangular platter to add some dimension, as well as provide more serving space.


Black and white cookies, made by my husband and me, represent both his birthday and his Air Force retirement. {If you are interested in seeing other cookie designs we've created, click here. For the recipe, click here.}


White cupcakes from a local bakery rest on a coordinating two-tiered server on the opposite end of the table.

A couple of silver airplanes {borrowed from my dad's study} add more interest and continue the theme.

  One rests atop the cake platters......


....... while the other sits nearby on the table.

I even found a little airplane napkin weight.


I love you and am proud of you, dad!

Silver Serving Pieces - primary from Target
Napkin Holder, Napkin Weight, & Small Cake Platter - by Mariposa
Silver Airplanes - Hobby Lobby/TJ Maxx
{To see other tablescapes using the same items, click on the links above.}

I'm linking with Between Naps on the Porch for Tablescape Thursday & A Stroll Thru Life for Tabletop Tuesday.

Wednesday, June 8, 2011

Wildcard Wednesday: Where Do I Store It All? Part 3

They last two Wednesday I shared where I hide store all of my dishes & linens.
{If you missed those posts, be sure to click here & here to see my dish-addiction collection.}
But now on to my third & final week of "Where Do I Store It All?"

You've seen my dishes & linens, but I haven't shown you where I keep those extra tablescape accessories.......you know, candles, vases, trays, etc.  So I'll show you a couple hiding places.

First, let's head back to the bathroom.  If you remember, last week I shared that the top shelf holds extra crystal & glass, as well as some china that once belonged to my grandma.  Well, the 2nd shelf holds a few goodies, too.


Cupcake holders, tiered holders {taken apart if possible to take up less space}, & a few tall candleholders fill the right side........
{It's hard to stack a "broken down" cupcake holder, so it looks a little messy!}

........while a few more lanterns & a stack of trays occupies the left.


Here's a look at the trays behind.

And just to prove this is really in the bathroom, here's a little shot that shows those towels on the 3rd shelf.


Okay, now on to the utility, where I'm lucky to have this row of cabinets......


Just for fun, here's a look at the decor above the cabinets.

I had planned on straightening the cabinets up a bit & adding some labels, but a crazy week, combined with not feeling well, changed those plans a little.  So here it is.....


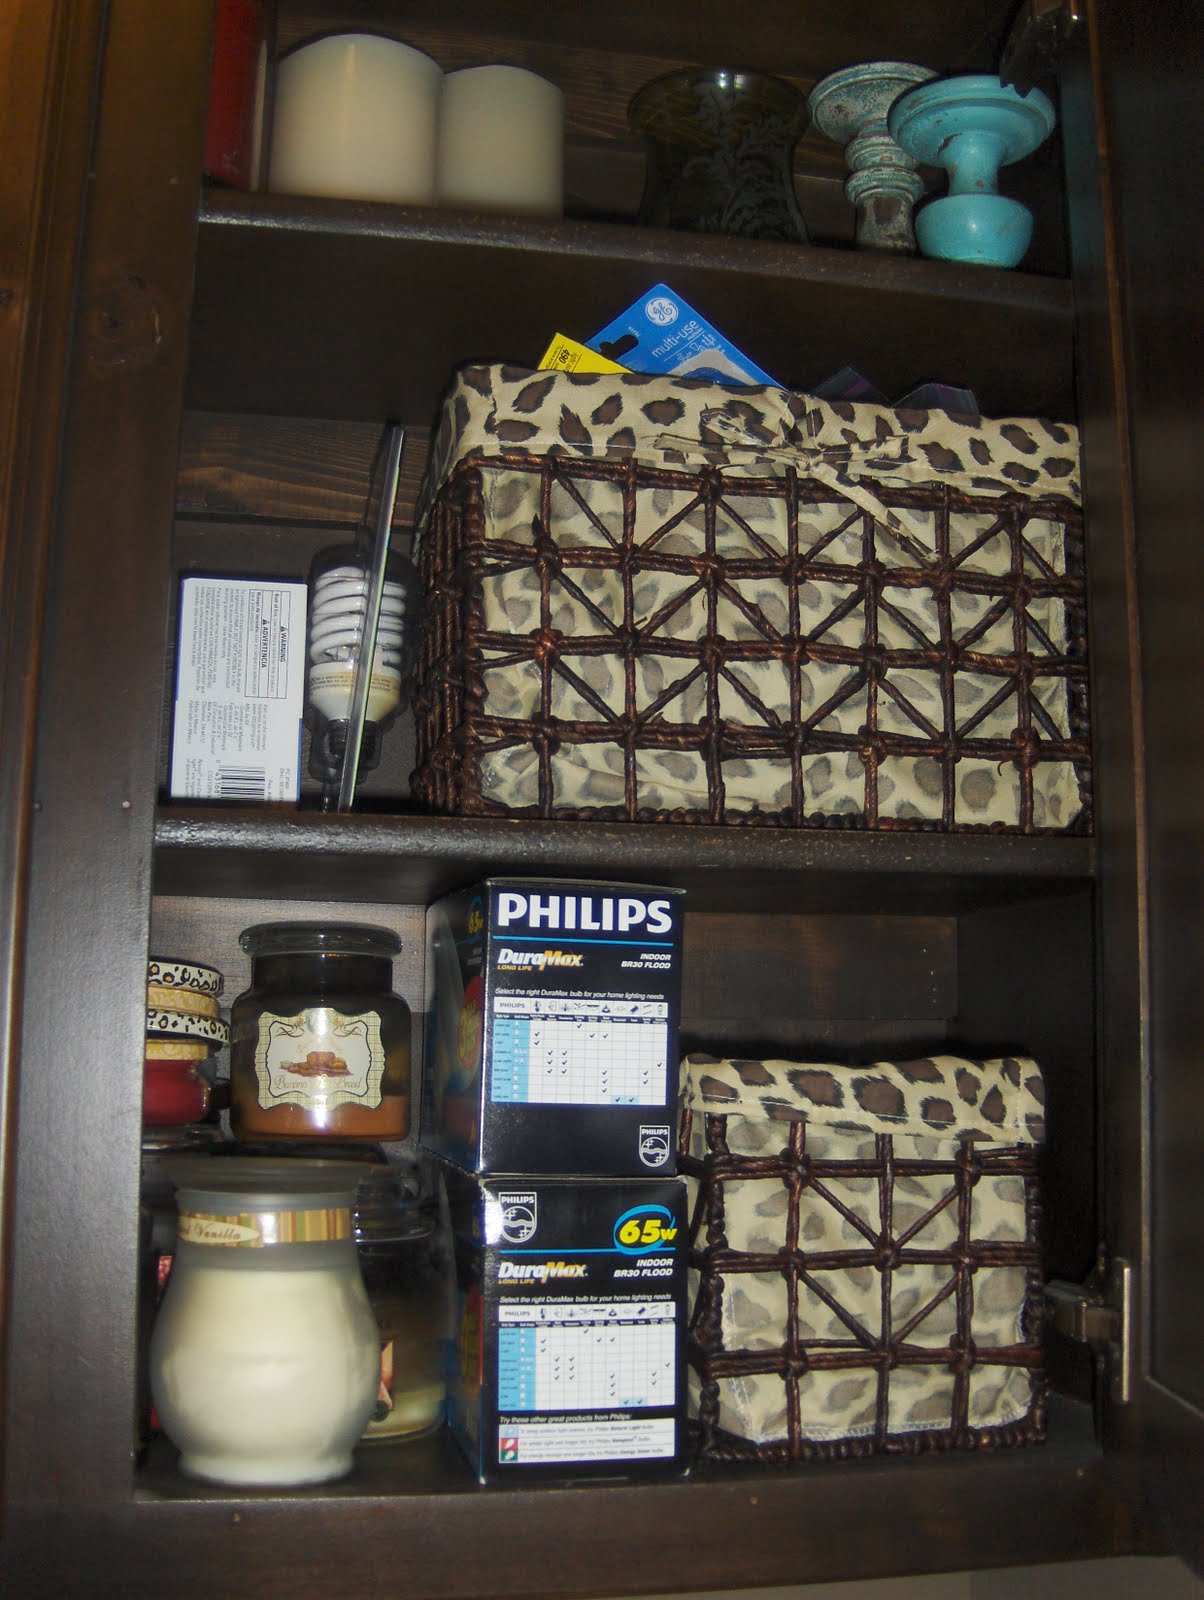
As you can tell, the top shelf of the 2 left cabinets is filled with candles, while the 2nd shelf holds vases & a few medium size candle holders.
{Looks like those vases need a good cleaning!}

The basket on the 2nd shelf holds all of my bud vases......you might remember seeing those silver ones & the colorful bird ones in previous posts.


The bottom shelf has three baskets........two are filled with votive & tealight holders, while the smaller basket in the middle holds actual votive & tealight candles.


The cabinet on the far right houses a few more candles & candleholders on the top shelf & my jar candles on the bottom.


And because my husband thinks batteries & light bulbs are important for some reason :), I left a little room for those, too.  {The larger basket contains light bulbs, while the smaller holds the batteries. Obviously the light bulbs are overflowing, as you can see a few "outside" of the basket.}
 

As far as the rest of my seasonal & centerpiece decor, tub after tub fills our large attic.  {Sorry, you're not going to get a pic today.....maybe someday.}  My husband even put down some carpet so that I could comfortably sit as I "search  my tubs." 

But just to give you a visual, about 4-5 spring/summer tubs {holding garden, beach, & patriotic decor, as well as greenery}, about 3-4 fall tubs {holding faux pumpkins, gourds, acorns, & more greenery}, and more than 25 Christmas tubs - no that's not a typo - {holding ornaments, trees, & other decor} line the attic.  That doesn't include a tub of my collection of Lolita goblets, some metal beverage tubs & buckets, keepsake items, & old tax papers!  Let's just say that sometimes I'm worried that the attic floor is gonna cave..........but I am so thankful for the space!

Oh & one more little hiding space for today......remember that table in the entry way?


Well, there's a "secret" compartment.
 It holds several salad serving sets, cake & pie servers, ice scoops, & other serving utensils.

I realize it's hard to see because they're all in plastic bags, so I pulled one cake server out just for you. 
Don't you just love it?  I have one with a zebra print heel, too.

Okay, that's it for now.  See, this wasn't as bad fun as last week's storage, was it?

Hope you've enjoyed seeing all of my hiding spots!

Tuesday, June 7, 2011

Tutorial Tuesday: Dressing Up Diapers & Other Little Tidbits

This post is more of a tidbit & idea post than it is a tutorial {although I will share links to a couple of tutorials a little further down}, but I hope that it provides at least a little inspiration for someone out there in blogland.


I don't know about you, but when it comes to baby gifts, I often want to give something practical, but at the same time, I want it to be fun & cute.......something pleasing to the eye.  
A package of diapers, though extremely practical, is typically not very eye-catching........now you could just wrap it in cute paper or throw it in a gift sack & call it done, but you know me.......that would be too easy!  And if you've been following my blog for a little while, you've probably learned that I'm all about gift baskets! {Click here to see some of the gift baskets I've put together over the past few years}.
So how do you dress up diapers to make them a little cuter?

Well, one idea is to display them in a cute bucket or container.

This past week, when I was buying a gift for a co-worker's baby shower, I decided to put together this fun little bucket of diapers.

I began by purchasing a plain black metal bucket on clearance at Hobby Lobby, and then "dressed it up" using chalkboard paint, scrapbook paper, ribbon, & trim.


So how exactly did I "dress it up", you ask?  Well, back in February {before I had a single follower!}, one of the first posts I did was a tutorial on how to make these fun buckets.  So rather than repeating the instructions, feel free to click here to get the scoop.  It's really rather easy!
 

One of the benefits is that you can choose any theme or color scheme.  I chose pink, black, & white for this one to coordinate with the baby's nursery.  {Even the little piece of chalk is pink!}

But I've also done lavendar & green in the past.

You can also make it pretty much any size you want.
{You could even use a large beverage tub if you wanted!}
 The possibilities are endless!  You're only limited by your imagination!


 Once the bucket was complete, I simply took the diapers out of the package, rolled them up, secured them with coordinating ribbon, & filled the bucket.


Not only are the diapers practical, but the little bucket can be used for a variety of baby items later on!


Of course, you could fill it with other baby goodies, too!  It doesn't just have to be diapers.


So what about for boys? 
Just skip the ribbon & trim and use boy scrapbook paper, or you could forgo the scrapbook paper altogether, & simply paint a little chalkboard in the center!

You could even make one as a wedding or birthday present.  Just adjust the colors & content as appropriate!
And while you're at it, make one for yourself, too!
***************************************************

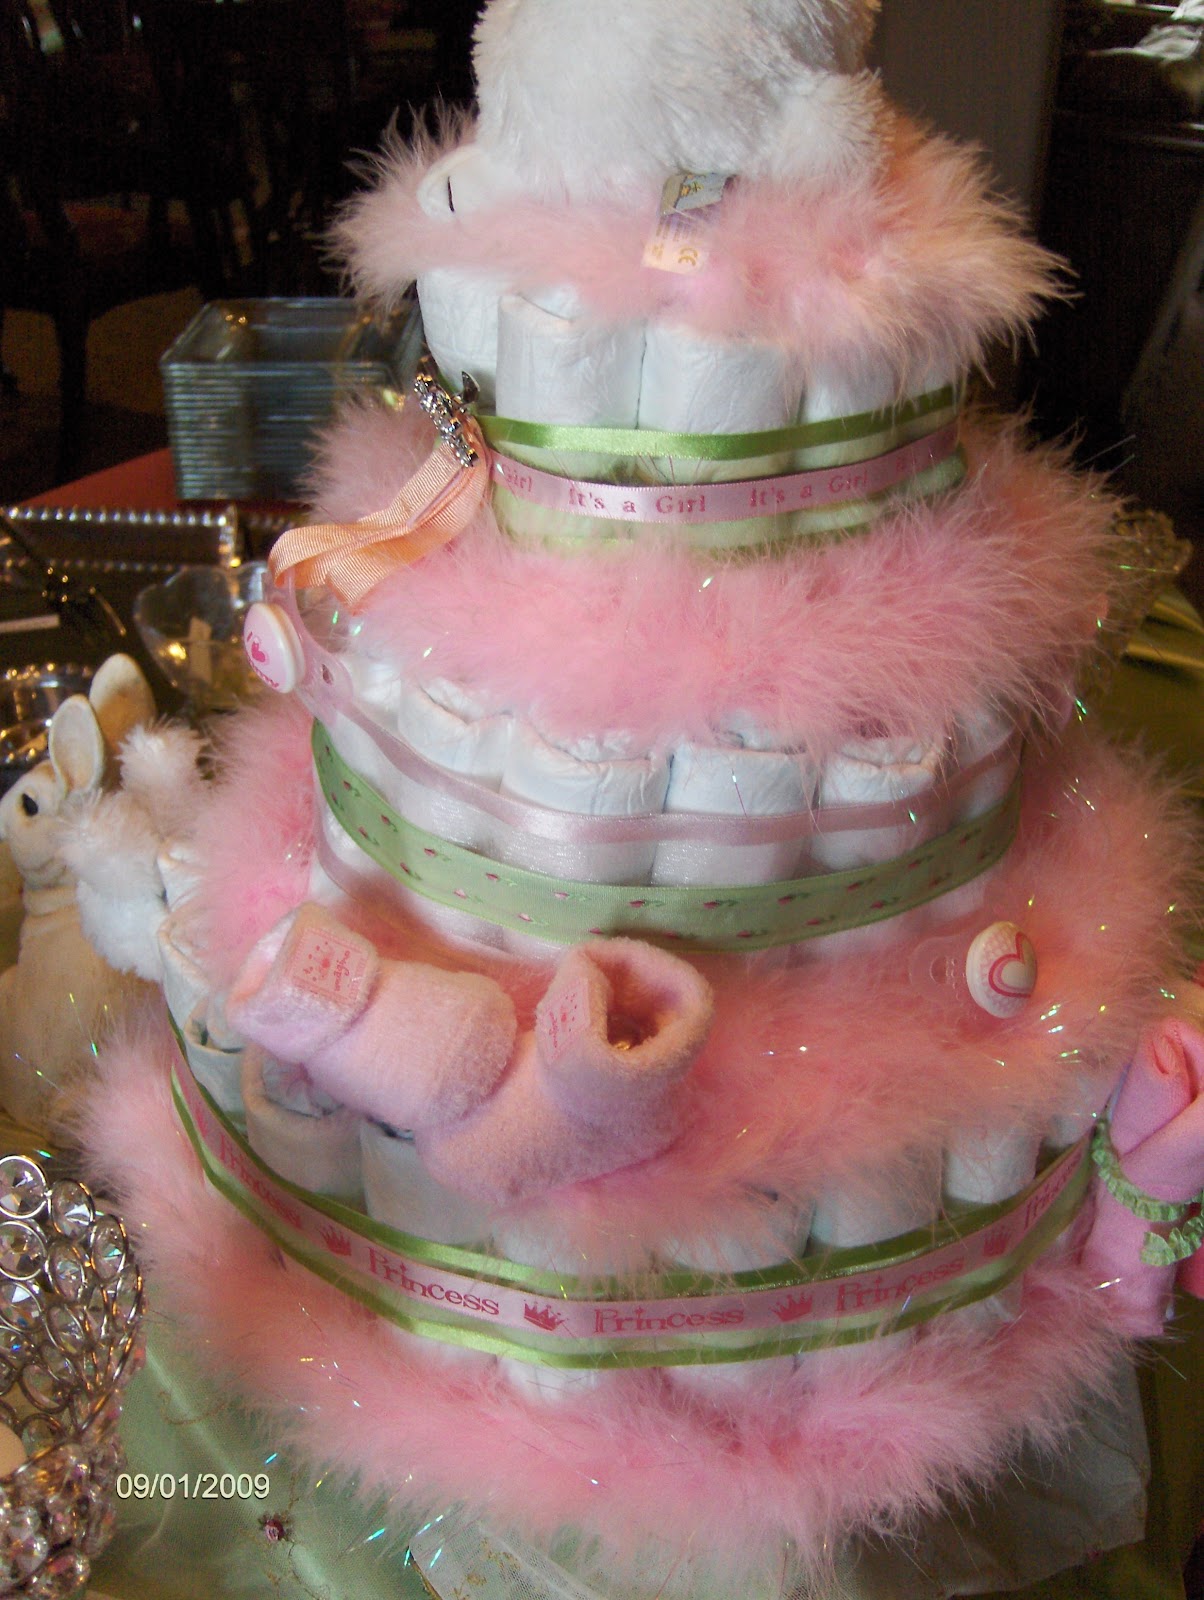
Another idea of dressing up diapers is to make a diaper cake.

{Click here for a tutorial}.


Again, you can decide on the theme, colors, & size!

What other baby gift ideas do you have?  I'd love to hear them!

I'm linking with the following parties:
Amaze Me Monday @ Dittle Dattle
Craft-O-Maniac Monday @ Craftomaniac
Market Yourself Monday @ Sumo’s Sweet Stuff
Masterpiece Monday @ Boogie Board Cottage
Wow Us Wednesdays @ Savvy Southern Style
What's Up Wednesday @ Sew Woodsy
Hoo’s Got Talent @ Night Owl Crafting
Make It Yours @ My Back Yard Eden
Show & Share @ Just A Girl
Whatever Goes Wednesday @ Someday Crafts
Thrilling Thursday @ Paisley Passions
Friday Favorites @ Simply Sweet Home
Pink Saturday @ How Sweet The Sound
Newbie Party @ DebbieDoos
What I Made Wednesday @ Sweet Peas & Bumble Bees
It's a Party @ A Creative Princess